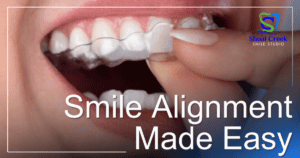
Dental implants are a permanent solution for missing teeth, offering a natural look and feel. The process involves several steps to ensure long-term success and functionality. Here’s a quick breakdown of what to expect:
- Consultation & Assessment: A thorough oral exam and personalized treatment plan.
- Preparatory Procedures: Bone grafting, if needed, to strengthen the jawbone.
- Implant Placement Surgery: Titanium posts are surgically placed into the jawbone.
- Healing & Bone Fusion: The implant integrates with the jawbone over 3–6 months.
- Abutment & Crown Placement: The final tooth restoration is attached for a complete smile.
This multi-step process ensures a durable and reliable replacement for missing teeth. With proper care, dental implants can last a lifetime.
Dental Implant Procedure | Medical Animation
Step 1: Initial Consultation and Assessment
Your journey to a renewed smile begins at Shoal Creek Smile Studio in Austin, TX, with a detailed consultation. This first step is all about understanding your needs and determining if dental implants are the right solution for you. It’s a relaxed, no-pressure appointment focused solely on evaluation and discussion.
During this visit, we’ll assess your oral health, talk through your goals, explore treatment options, and address any questions or concerns. Let’s break it down into two key parts: the comprehensive oral examination and personalized treatment planning.
Complete Oral Examination
We start by reviewing your dental and medical history. This includes discussing any past surgeries, chronic conditions like diabetes or autoimmune diseases, and medications that could influence healing. Lifestyle factors, such as smoking and oral hygiene habits, are also important to consider. Research shows that smoking can lead to complications like slower healing, infections, and even implant failure.
Next comes a hands-on examination. We carefully check your gums and remaining teeth for signs of infection, gum disease, or other issues that might impact implant placement. Factors like gum health, bone loss, and recession are closely evaluated.
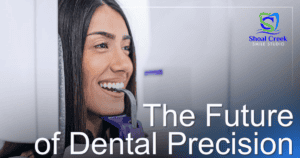
Advanced digital imaging tools, such as panoramic X-rays and cone beam computed tomography (CBCT) scans, play a crucial role here. These technologies help us assess the health, density, and volume of your jawbone to ensure it can support implants. If we identify any concerns – like gum disease, untreated cavities, or infections – those will need to be resolved before moving forward with the implant process.
Treatment Planning
Once we’ve completed the examination, we’ll create a customized treatment plan tailored to your specific needs and goals. Whether you’re considering a single-tooth implant, multiple implants for a bridge, or full-arch implants for a complete smile makeover, we’ll guide you through your options.
Your treatment plan will outline key details, such as the number and placement of implants and the overall timeline. If additional procedures – like bone grafting or sinus lifts – are needed to ensure the success of your implants, we’ll explain those as well.
We’ll also discuss restoration options to fit your lifestyle and preferences. Whether you need an implant-supported crown, bridge, or full-arch replacement, we’ll go over how each option works and which might be the best fit for you. During this phase, you’ll receive a clear breakdown of costs, timelines, and any preparatory steps, such as improving oral hygiene or quitting smoking to enhance healing.
Before wrapping up your consultation, we’ll provide pre-treatment instructions and answer any lingering questions about candidacy, implant types, risks, recovery, or insurance coverage. This preparation ensures you’re fully informed and ready for the next step toward achieving a healthy, long-lasting smile.
Step 2: Preparatory Procedures
Bone grafting becomes necessary when the jawbone doesn’t have enough density or volume to support a dental implant. According to a 2016 study of nearly 800 patients, over half of the implant sites required a bone graft before moving forward with the implant placement. After losing a tooth, the jawbone can lose up to 25% of its density within the first year, followed by an additional 30%–60% over the next few years.
Bone Grafting (If Needed)
Bone grafting involves adding material to areas of the jawbone that have lost density, providing a framework for new bone growth. Dr. David Hudnall, DMD, explains:
"Bone grafting is possible because natural bone has the ability to regenerate itself if provided the space and structure on which to develop and thrive".
When a tooth is lost, the jawbone begins to shrink due to the lack of stimulation from the tooth root. Since dental implants rely on a strong jawbone – and boast a success rate of over 95% – ensuring adequate bone support is a critical step.
At Shoal Creek Smile Studio, we carefully assess your individual needs to choose the right grafting material. The four main types of bone grafts include:
- Autografts: Bone harvested from your own body, such as the hip, tibia, or back of the jaw. These are considered the gold standard because they promote quicker healing and new bone growth. However, they do require an additional surgical site.
- Allografts: Bone obtained from human donors and processed through bone banks. This option eliminates the need for a second surgical site but carries a minimal risk of disease transmission.
- Xenografts: Bone sourced from animals, typically cows or pigs, and processed for safety. This is a good alternative when autografts are not feasible or if patients prefer not to use donor bone.
- Alloplasts: Synthetic bone materials, such as hydroxyapatite or beta-tricalcium phosphate. These avoid any risk of disease transmission and are often used as a last resort.
Once the graft material is placed, the healing process begins. The graft serves as a scaffold, allowing your natural bone to grow and eventually replace it.
The procedure is typically done under local anesthesia. A small incision is made in the gum to place the grafting material at the treatment site. In many cases, a protective membrane is added to stabilize the graft while new bone forms.
Recovery and integration are crucial after the procedure. Initial healing usually takes about a week, but the graft itself needs at least three months to integrate. For most patients, the complete process takes roughly six months, though larger grafts may require nine to 12 months to heal fully. Synthetic grafts typically take longer to integrate compared to autografts.
Post-procedure care is essential for successful healing. Keep the area clean, follow any prescribed medications, and avoid alcohol for two weeks, heavy lifting for 48 hours, and smoking or vaping, as these can interfere with recovery.
Implants are generally placed once the graft has fully healed. While bone grafts typically require about four months of healing before implant placement, waiting six to 12 months is often recommended to ensure the new bone remains stable and doesn’t lose density.
Although bone grafting adds time to the overall treatment process, it’s a critical step in creating a strong foundation for the long-term success of dental implants.
Step 3: Implant Placement Surgery
After your jawbone has healed, the titanium implant is carefully placed into the bone, creating a secure base for your new tooth. Thanks to modern advancements, this procedure is often simpler than patients anticipate.
Surgery Steps
The implant placement process is highly precise and typically lasts 30 to 60 minutes for one implant or 2 to 3 hours for multiple implants.
To begin, the surgeon makes a small incision in the gum to expose the bone underneath. Using a specialized drill, they create an opening that matches the size of the implant. The titanium implant is then inserted, and in some cases, a healing abutment is attached to encourage gum recovery. Finally, the incision is sutured to protect the area. This meticulous approach helps ensure effective pain management and a smooth recovery.
Pain Management and Recovery
Local anesthesia is commonly used to block pain during the procedure. For patients feeling anxious or undergoing multiple procedures, sedation or general anesthesia may be recommended. After surgery, mild swelling and discomfort are normal but can be managed with prescribed pain relievers or over-the-counter medications like NSAIDs. Stronger pain medications may be suggested for the first day or two, though many patients find that basic options work well.
Taking care of yourself after surgery plays a big role in the success of your implant. Use a cold compress on the area for 10 minutes at a time during the first few days to reduce swelling. Keep your head elevated while sleeping, stick to soft foods, and take time to rest. Gentle brushing with a soft toothbrush, rinsing with an antibacterial mouthwash twice daily, and using warm salt water after meals will help maintain oral hygiene. Avoid smoking, as it can interfere with healing and lower the chances of a successful implant.
At Shoal Creek Smile Studio, we provide thorough post-operative care instructions and are always available to answer any questions during your recovery. This period is key to preparing for the next stage, where the implant fuses with the bone.
sbb-itb-fb98d5c
Step 4: Healing and Bone Fusion
After the surgery, a process called osseointegration begins, where your jawbone bonds with the titanium implant, creating a strong and stable foundation for the dental restoration.
"Osseointegration is the biophysical and biologic process that has made dental implant placement a predictable and effective solution for replacing missing teeth." – Argon Dental USA
During this phase, bone cells grow and attach directly to the implant. Titanium is the material of choice because it forms a durable connection with natural bone. Typically, this fusion process takes about three to six months. However, factors like lower bone density in the upper jaw or the need for additional procedures, such as bone grafting, might extend the timeline.
To ensure proper healing, it’s essential to follow your dentist’s post-operative care instructions. Avoid any movements that could disrupt the implant, maintain gentle oral hygiene, and steer clear of putting pressure on the implant. In the early stages, stick to a soft-food diet to reduce strain on the area. Incorporating adequate protein into your meals can also aid in recovery. At the same time, it’s critical to avoid hard foods, smoking, alcohol, and strenuous activities, as these can interfere with the healing process. When planned and executed carefully, implant success rates can exceed 95%. Once the implant is securely fused, the next step involves regular monitoring to ensure everything is on track.
Monitoring Healing Progress
Regular follow-up visits are key to tracking the healing process and confirming the implant’s stability. At Shoal Creek Smile Studio, these appointments are carefully scheduled throughout your recovery. Advanced imaging tools help your oral surgeon evaluate how well the bone is integrating with the implant and spot any potential issues early. If you notice unusual symptoms – like persistent pain, swelling that worsens, or signs of infection – don’t wait; contact your dental team immediately.
Temporary Restorations
While osseointegration is underway, temporary restorations can help maintain both functionality and appearance. Depending on your specific needs, temporary crowns or dentures may be used during this period. For visible areas, such as front teeth, aesthetics are often prioritized.
To protect the temporary restoration, follow the cleaning instructions provided by your dentist and avoid hard or crunchy foods. Once osseointegration is complete, the temporary restoration will be replaced with a custom-made, permanent crown. This final step ensures the restoration blends seamlessly with your natural teeth, marking the end of the healing phase and the beginning of a fully functional implant.
Step 5: Abutment Placement and Final Restoration
After the implant has fully fused with the jawbone through osseointegration, the final phase begins. This step transforms your dental implant into a fully functional tooth replacement by attaching the abutment and placing the custom crown.
Attaching the Abutment
The abutment acts as the essential link between the dental implant and the artificial tooth that will sit above the gum line .
This outpatient procedure starts with your dentist numbing the area around the implant and making a small incision in the gum tissue to expose the implant . The abutment is then secured to the implant using a specialized screw tightened to ensure stability .
Abutments come in various materials, such as titanium, stainless steel, zirconia, gold, or polyether ether ketone. The choice depends on your specific needs and the type of restoration . For crowns, the abutment typically resembles a "stumpy screw" design.
Once the abutment is in place, your dentist will check its fit and suture the gum tissue around it. Healing generally takes 4–6 weeks, though initial inflammation from the sutures usually subsides within 1–2 weeks .
To manage discomfort, you can use over-the-counter pain relievers, apply ice to reduce swelling, and stick to a soft-food diet for a few days. Use a soft-bristled toothbrush, a mild non-alcoholic mouthwash, and floss gently around the area. Avoid hot and spicy foods, alcohol, and tobacco during this healing phase.
Once the abutment has stabilized and the gums have healed, the focus shifts to crafting the permanent crown.
Custom Crown Creation and Placement
The final step is creating and placing the permanent crown, designed to seamlessly match your natural teeth. This process starts with taking detailed impressions and bite registrations to ensure proper alignment. Many dental practices now use CAD/CAM imaging for precision design, ensuring the crown fits perfectly.
At Shoal Creek Smile Studio, the dental team works with you to choose the crown material, attachment method, and color to ensure it blends naturally with your smile. For front teeth, a temporary crown may be used as a guide while the final crown is perfected. This allows the dental lab to refine details like color, shape, and gum contouring.
The crown, which is the visible part of the restoration, is crafted to match the hue and shape of your natural teeth. Depending on the design, it can be cemented in place or screwed onto the abutment.
During the final appointment, your dentist will place the crown over the abutment and make adjustments to ensure a comfortable fit and proper bite alignment . You may go through bite tests to confirm everything feels right before the crown is permanently secured. The goal is to ensure the crown integrates seamlessly with your gums and smile while functioning well for chewing and speaking.
Some mild sensitivity after crown placement is normal. You can gradually return to your regular diet, though it’s best to avoid very hard foods at first. The cost for crown placement typically ranges between $1,000 and $3,000 per crown, separate from the implant surgery.
To ensure the longevity of your restoration, maintain excellent oral hygiene. Brush gently around the crown, floss regularly, and schedule routine dental checkups. With proper care, your implant restoration can provide reliable function and a natural look for years to come.
Post-Procedure Care and Maintenance
Once your dental implants are in place, consistent care is key to keeping them in top condition. With proper maintenance, implants can deliver reliable performance for decades. Clinical studies report success rates exceeding 95% for dental implants.
Daily Oral Hygiene Practices
Caring for your dental implants requires a strong commitment to daily oral hygiene. Although implants themselves won’t develop cavities, the surrounding gum tissue and bone need attention to prevent issues like peri-implantitis.
- Brushing: Brush at least twice a day using a soft-bristle toothbrush and low-abrasive toothpaste. This helps protect the implant surface and prevents irritation to the gums, especially where the crown meets the gum line. Avoid hard-bristled brushes or abrasive toothpaste, as these can damage the implant or irritate surrounding tissue.
- Flossing: Flossing is crucial – ideally twice a day – to remove plaque and debris. Use gentle motions to clean around abutments and between teeth. Water flossers can be especially helpful for cleaning hard-to-reach areas, particularly if you have multiple implants. Keep in mind that only 16% of American adults floss daily, so this step often gets overlooked.
- Mouth Rinses: Antimicrobial mouth rinses provide an extra layer of protection against bacterial buildup. Incorporating these into your routine can further safeguard your implants.
Pair these habits with smart lifestyle choices to maximize the longevity of your implants.
Lifestyle Adjustments
Certain lifestyle changes can significantly impact the health and durability of your dental implants.
- Quit Smoking: Smoking increases the risk of implant failure by tenfold. It restricts blood flow, slows healing, and raises the likelihood of gum disease and oral cancer[77,79]. If you smoke, quitting is one of the best steps you can take to protect your implants.
- Balanced Diet: A diet rich in lean proteins, fruits, vegetables, and dairy supports oral health. Limit sugary and acidic foods, which can harm the gums and teeth[77,80]. Also, avoid biting into hard foods like ice, nuts, or hard candies, as these can damage the crown or stress the implant. Sticky foods like caramel or taffy should also be avoided[78–81].
- Protective Measures: Never use your teeth as tools to open packages or bottles, as this can strain your implants[77,83]. If you grind your teeth at night or play contact sports, consider wearing a custom mouthguard to shield your implants from excessive force[80,81].
- Other Habits: Manage stress, stay hydrated, and moderate alcohol consumption to support overall oral and implant health[77,80,83].
Routine Checkups
Regular dental checkups are essential to maintaining the health of your implants. Most dentists recommend seeing your dental team every six months, just as you would for natural teeth[84,85].
During these visits, your dentist will:
- Examine your gums and the implant site.
- Check your bite alignment to ensure no undue stress is placed on the implant.
- Take X-rays if needed to assess the bone surrounding the implant.
- Perform professional cleanings to remove plaque and tartar that daily brushing and flossing might miss.
If you notice any pain, swelling, or changes in your bite, contact your dentist immediately[84,85]. Early intervention can prevent minor issues from becoming major problems.
For patients with specific risk factors – like diabetes or a history of gum disease – more frequent visits may be necessary, especially during the first year after the implant is placed. These appointments allow your dentist to monitor your progress and adjust your care plan as needed.
Conclusion
The process of getting dental implants involves a series of carefully planned steps that provide a durable solution for missing teeth. From the initial consultation to the final restoration and ongoing care, every phase is vital for achieving a successful outcome. Each step depends on biological healing and integration, which require precision and patience – shortcuts simply aren’t an option.
As Trailhead Advanced Dentistry explains:
"The dental implant process entails several stages over the course of several months, such as extraction, healing, screw implantation, osseointegration, abutment placement and finally crown fitting." – Trailhead Advanced Dentistry
A critical part of the process is osseointegration – the fusion of the titanium implant with your jawbone. This step is the foundation of implant success, and it demands time, proper care, and strict adherence to your dentist’s instructions to reduce the risk of complications. With more than 3 million implants placed annually in the United States, this procedure has a strong track record of reliability when done correctly.
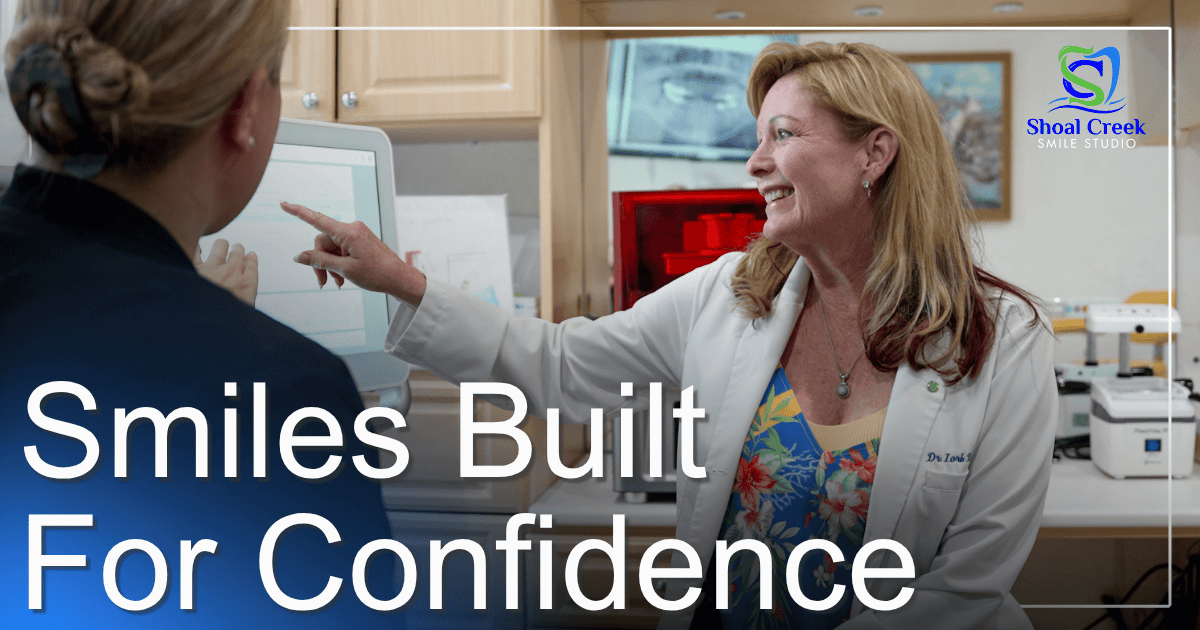
At Shoal Creek Smile Studio, Dr. John and Dr. Lori Babineau combine advanced technology with personalized care to deliver outstanding results. Their use of CBCT imaging for detailed 3D planning and computer-guided surgery achieves an impressive 98.5% accuracy rate in implant placement. To ensure a comfortable experience, the practice also offers sedation dentistry and relaxation amenities, making the journey smoother for patients.
Your role in the process doesn’t end once the procedure is complete. Long-term success depends on your commitment to proper care. This includes maintaining excellent oral hygiene, following post-operative instructions, attending regular check-ups, and avoiding habits like smoking that can jeopardize the implant’s stability. With consistent care and routine dental visits, dental implants can last a lifetime.
Choosing dental implants is an investment in your oral health, confidence, and overall quality of life. By partnering with skilled professionals who emphasize advanced technology and patient comfort, you’re taking a significant step toward a healthier, more radiant smile.
FAQs
Am I a good candidate for dental implants?
To qualify for dental implants, you’ll need healthy gums, enough jawbone density to support the implant, and solid overall oral health. Keeping up with good oral hygiene habits is key to ensuring the long-term success of the procedure. Dentists typically prefer non-smokers or those actively trying to quit, as smoking can interfere with healing and raise the chances of complications.
If you have any medical conditions, like uncontrolled diabetes, it’s important to manage them before undergoing the procedure to promote proper healing. During your consultation, your dentist will assess your individual circumstances to decide if dental implants are the right option for you.
How long does it usually take to complete the dental implant process?
The dental implant journey usually spans 5 to 9 months, though the exact timeline can differ depending on your specific needs and circumstances.
Here’s what the process generally looks like: It starts with an initial consultation to assess your oral health. If needed, preparatory procedures like tooth extractions or bone grafts are completed first. Next comes the placement of the implant itself, followed by a healing period to allow the implant to integrate with your jawbone. Finally, a custom crown or restoration is placed to complete your new smile. Every step is carefully planned to ensure the best results.
At Shoal Creek Smile Studio in Austin, TX, we focus on personalized care and leverage advanced dental technology to make the entire process as seamless as possible, delivering results designed specifically for your unique smile.
What risks or complications can occur with dental implants, and how can they be prevented?
Dental implants are a dependable way to restore your smile, offering both functionality and aesthetics. However, like any medical procedure, they aren’t without potential risks. Some complications that might arise include infection at the implant site, nerve damage, implant failure, or sinus problems when implants are placed in the upper jaw.
To minimize these risks, maintaining good oral hygiene is key. Follow your dentist’s post-procedure care instructions carefully, and steer clear of habits like smoking, which can interfere with the healing process. Selecting a dentist with extensive experience and skill is equally important for the success of your implants. Regular dental visits and proper care can go a long way in preventing complications, ensuring your implants stay healthy and secure for years to come.